

TYING COILS WITH BUCKTAIL
In this article you will learn what you'll need to tie coils for inlines and spinnerbaits and you'll find a step-by-step explanation on how to tie them.
What are the necessary items?
- Bucktails or deer tails in your favourite colors. Look for those with the longest hairs you can find. Preferably the hairs should be 4" or longer.
- Super glue or nail polish.
- A pair of sharp scissors.
- Tying thread.
- Coils. These can be plastic oils that you get from ear-cleaning sticks, plastic tubing for water tanks or the metal coils that are available from most tackle stores that sell lurebuilding components. These coils are sold in standard models and weighted models.
Which items would sure come in handy but aren't necessary?
- A vice.
- A small cutter knife.
- Two-ton epoxy glue.
- A bobbin holder.
- An old sea-fishing hook from which you remove the hook point and the hook eye.
- Other materials that you may want to add to the coils like flashabou, marabou feathers, saddle hackles, etc.
Some tips:
Check whether the inner diameter of the coil is large enough to slide the stainless steel wire frame through it. If you intend to use the coil as a spacer to secure the eye of the frame, make sure the diameter is large enough to support two pieces of stainless steel wire.
You can use all sorts of threads as tying thread as long as it is strong, not too thin nor too thick and smooth. I used some leftover dyneema line of 0.12mm diameter.
Super glue is sold in plastic containers that have a drop-release so you can control the amount of glue that you release on the wrappings. Cheap containers often break fairly quickly which can cause too much glue flowing towards the spool that contains tying thread. Make sure you ventilate the area in which you intend to tie the coils because the vapors that are released by the super glue, can cause you a headache. Make sure these vapors do not get in contact with your eyes!
The following pictures show a coil that has been tied using a tying vice and a bobbin holder.
Tying your coils explained to you step by step:

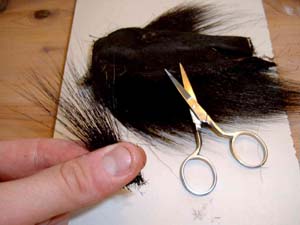
Step 1
Grab your gear!
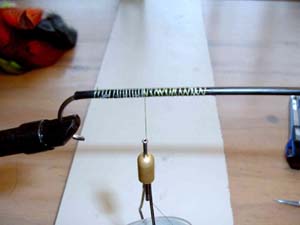
Step 2
Cut a piece of plastic tubing of about 2-4" long. Position the old sea-fishing hook in your vice and slide the plastic tubing over it. It should fit snugly on the old hook and you should be able to rotate it with some effort. You can bend the hook a bit so the coil fits on it. Put some super glue on the tubing and wrap your tying thread to the right and back. Leave about 1cm uncovered on the left-hand side.
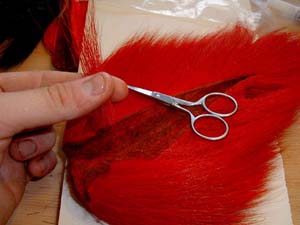
Step 3
Cut a small bundle of bucktail hair from the tail. Make sure it's small enough because large bundles of hair are difficult to secure with tying thread.
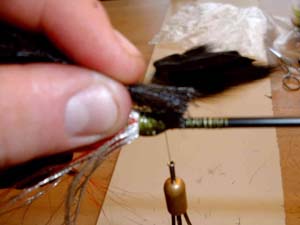
Step 4
Position the bundle of hair on the tubing on the left-hand side.
Step 5
Try to spread out the hair around the tubing using your fingers. Try to get a nice round of hair so it is spread out equally.
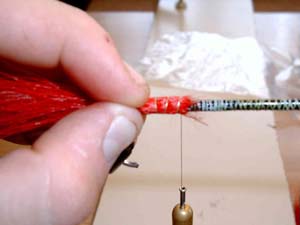
Step 6
Secure the bundle of hair with a few loose wraps of tying thread so the hairs lie flush against the tubing.
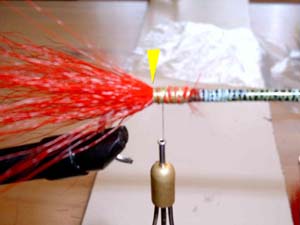
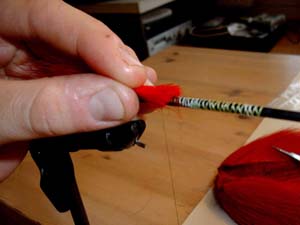
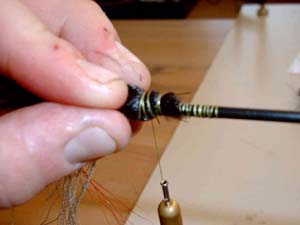
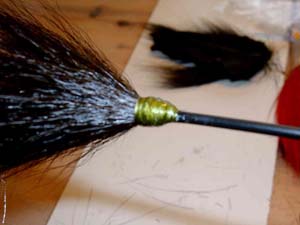
Step 7
Now pull the next wrappings hard so the hair flairs out. These extra wraps should be placed where you can see the yellow pointer arrow in the picture. Put a drop of super glue or nail polish on the wrappings and cover them entirely. Make sure no glue of nail polish ends up on the hair itself because when it hardens, the hair will break while fishing either from casting the lure or from pike's teeth.
When the glue has dried a little, pull on the bucktail hairs to see whether some come undone or not. If they do, you'll have to start all over again because when you can pull a few hairs loose, the rest will follow soon afterwards because the grip that the wrappings has on the hair is loosened.
It is also easier to start on the next round of hair while the glue is still a bit wet. It allows the next round of hair to be secured a lot easier. The hairs from the next round of bucktail hair may be glued to the wrappings but that's not so much a problem.
Make sure that the hair is spread equally around the tubing and if necessary add some extra hair to make sure the hair is spread out equally around the tubing.
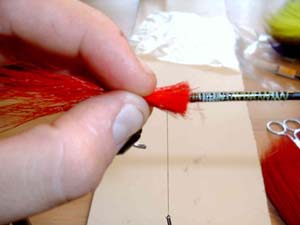
Step 8
Add a second bundle of hair and spread it out like I explained in step 5. Tie the hair close to the first wrappings. This way your coil will be bulkier but it will pulsate less through the water. If you tie the hair at about 1cm from the previous wrappings, your coil will be spacier and the hair will really pulsate in the water. Each tail also pulsates more when you retrieve the lure with jerks or twitches.

Step 9
Now it's time for some variety. When you visit a store, you sometimes pick up some items that could be used for tying bucktails. This silvery thread is one of those things. Saddle hackles can be used as well but do not tie them on the end of the coil because they will break easily when you cast out your bucktail lures or when retrieveing them. Therefore tie some rounds of bucktail over them to protect them.
You can see that the wrappings on the tubing are thicker now. That's because both rounds of hair are tied in over one another. When you first try to tie the hair on your tubing, it's difficult to spread the hair out equally. If you tie a coil on which the rounds of hair are separated by a 1cm space, you will not experience this problem.
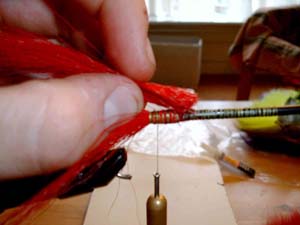
Step 10
Now I'll change colors for the bucktail. Let your imagination run wild! But remember this: the last color of bucktail hair that you tie on the tubing is the one that is most visible in the end. If you would tie two rounds of white bucktail hair and if you would finish this coil with a round of black hair, very little of the white hair will remain visible. A possible solution is to use shorter hair to tie the last round of hair. Use hair that is shorter than the white hair that you first used. This way a lot more white hair will be visible afterwards. Experiment with some color combo's by varying the length of the hair that you use.
Step 11
In this picture you can see that the bundle of hair is tied over some thick wrappings.
Step 12
Spreading out the hair can be difficult now.
Step 13
Repeat steps 4-6.
Step 14
Obviously the hair wasn't spread out equally so I'll need to add a small bundle of hair on this side.
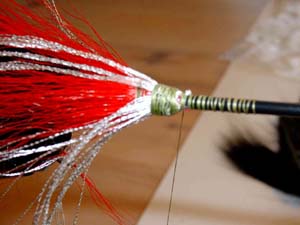
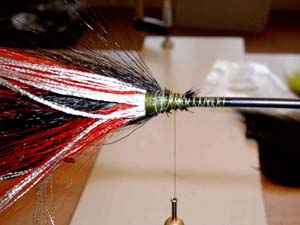
Step 15
Make sure the final wrappings are tied neately. Looks count, you know! You can finish the head of the tubing with super glue or nail polish but the best coating is two-ton epoxy glue. This glue protects the head from pike's teeth. I added some red hair on this coil. You can color these last wrappings if you like before you coat it with the epoxy glue.
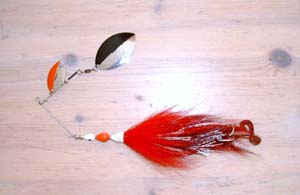
Step 16
Finally you can see the result, on a completely assembled spinnerbait.
Thijs Knoester.